Inicio Rápido
Esta guía te ayudará a través del proceso de creación de una app "Hola Mundo" básica en Electrón, similar a electron/electron-quick-start.
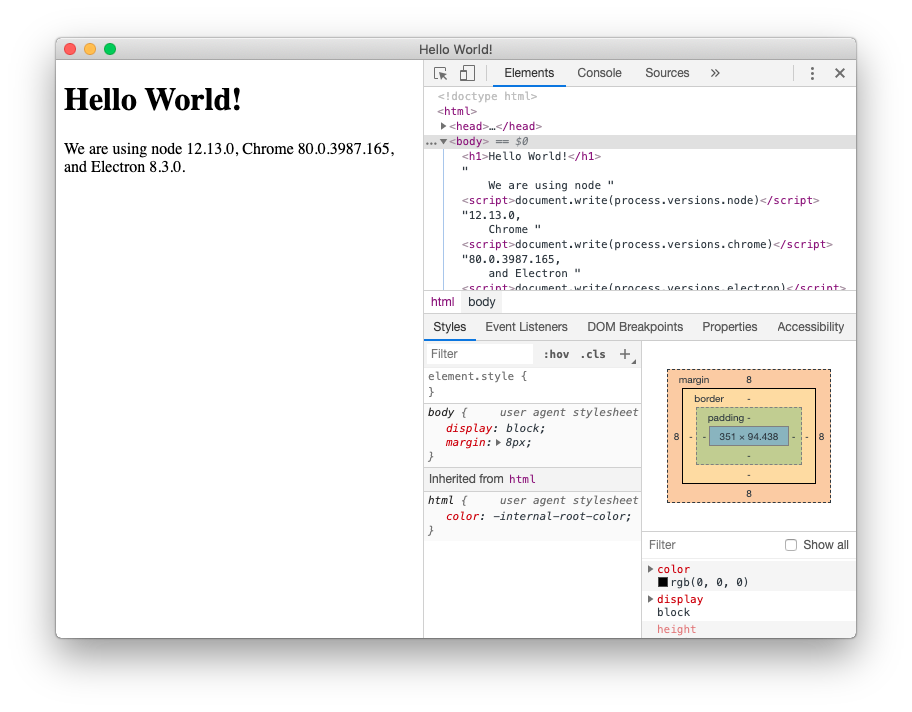
Al final de este tutorial, tu app abrirá una ventana de navegador que mostrará una página web con información de las versiones de Chromium, node.js y Electrón que se están ejecutando.
Prerequisites
Para usar Electron, debes instalar Node.js. Te recomendamos que uses la última versión LTS disponible.
Por favor instala Node.js usando instaladores precompilados para su plataforma. De lo contrario, puedes encontrar problemas de incompatibilidad con diferentes herramientas de desarrollo.
Para comprobar que node.js se instaló correctamente, escribe los siguientes comandos en tu terminal:
node -v
npm -v
Estos deben imprimir las versiones de Node.js y npm respectivamente.
Nota: Como Electron incrusta Node.js en su binario, la versión de Node.js en la que se ejecuta tu código no está relacionada con la versión ejecutada en tu sistema.
Crea tu aplicación
Scaffold del proyecto
Las aplicaciones Electron siguen la misma estructura general que otros proyectos en Node.js. Comienza creando una carpeta e iniciando un paquete npm.
- npm
- Yarn
mkdir my-electron-app && cd my-electron-app
npm init
mkdir my-electron-app && cd my-electron-app
yarn init
El comando interactivo init te pedirá que configures algunos campos en su configuración. Hay algunas reglas que seguir para este tutorial:
entry pointdebe sermain.js.authorydescriptionpueden ser cualquier valor, pero son necesarios para empaquetar aplicaciones.
Tu archivo package.json debería verse algo así:
{
  "name": "my-electron-app",
  "version": "1.0.0",
  "description": "Hello World!",
  "main": "main.js",
  "author": "Jane Doe",
  "license": "MIT"
}
Luego, instala el paquete electron en las devDependencies de tu aplicación.
- npm
- Yarn
npm install --save-dev electron
yarn add --dev electron
Note: If you're encountering any issues with installing Electron, please refer to the Advanced Installation guide.
Finalmente, querrás ser capaz de ejecutar Electron. En el campo scripts de tu configuración package.json, añade un comando start como se muestra a continuación:
{
  "scripts": {
    "start": "electron ."
  }
}
Este comando start te permitirá abrir tu aplicación en modo desarrollo.
- npm
- Yarn
npm start
yarn start
Nota: Este script le dice a Electron que se ejecute en la carpeta raíz de su proyecto. En esta etapa, tu aplicación arrojará un error diciendo que no puede encontrar una aplicación para ejecutar.
Ejecutar el proceso principal
El punto de entrada de cualquier aplicación de Electron es su script main. Este script controla el proceso principal que se ejecuta en un entorno de Node.js completo y es responsable de controlar el ciclo de vida de tu aplicación, mostrando interfaces nativas, realizando operaciones privilegiadas y gestionando procesos renderizadores (más sobre eso más adelante).
Durante la ejecución, Electron buscará este script en el campo main de la configuración package.json de la aplicación, el cual deberías de haber configurado durante el paso Inicializacion del projecto.
Para inicializar el script main, cree un archivo vacío llamado main.js en la carpeta raíz de tu proyecto.
Nota: ¡Si vuelves a ejecutar el script
starten este momento, tu aplicación no debería de arrojar errores! Sin embargo, aún no hará nada porque no hemos añadido ningún código amain.js.
Crear una página web
Antes de poder crear una ventana para nuestra aplicación, necesitamos crear el contenido que se cargará en ella. En Electron, cada ventana muestra contenidos web que pueden cargarse desde un archivo HTML local o desde una URL remota.
Para este tutorial estarás haciendo el primero. Crea un archivo index.html en la carpeta raíz de tu proyecto:
<!DOCTYPE html>
<html lang="en">
  <head>
    <meta charset="UTF-8">
    <!-- https://developer.mozilla.org/en-US/docs/Web/HTTP/CSP -->
    <meta http-equiv="Content-Security-Policy" content="default-src 'self'; script-src 'self'">
    <title>Hello World!</title>
  </head>
  <body>
    <h1>Hello World!</h1>
    We are using Node.js <span id="node-version"></span>,
    Chromium <span id="chrome-version"></span>,
    and Electron <span id="electron-version"></span>.
  </body>
</html>
Nota: Al observar este documento HTML, puede observar que los números de versión están ausentes en el texto del body. Los insertaremos manualmente más tarde usando JavaScript.
Abriendo tu página web en una ventana del navegador
Ahora que tienes una página web, cárgala en una ventana de la aplicación. Para hacerlo, necesitarás dos módulos de Electron:
- The
appmodule, which controls your application's event lifecycle. - The
BrowserWindowmodule, which creates and manages application windows.
Because the main process runs Node.js, you can import these as CommonJS modules at the top of your main.js file:
const { app, BrowserWindow } = require('electron')
Luego, añade una función createWindow() que carga index.html en una nueva instancia BrowserWindow.
const createWindow = () => {
  const win = new BrowserWindow({
    width: 800,
    height: 600
  })

  win.loadFile('index.html')
}
A continuación, llame a esta función createWindow() para abrir su ventana.
In Electron, browser windows can only be created after the app module's ready event is fired. You can wait for this event by using the app.whenReady() API. Llama a createWindow() después de que whenReady() resuelve su Promesa.
app.whenReady().then(() => {
  createWindow()
})
Nota: ¡En este punto, su aplicación Electron debería abrir correctamente una ventana que muestre su página web!
Gestiona el ciclo de vida de tu ventana
Aunque ahora puede abrir una ventana del navegador, necesitará algún código repetitivo adicional para que se sienta más nativo en cada plataforma. Las ventanas de la aplicación se comportan de manera diferente en cada sistema operativo, y Electron pone la responsabilidad en los desarrolladores para implementar estas convenciones en su aplicación.
En general, puede utilizar el atributo platform de la variable global process para ejecutar código específicamente en ciertos sistemas operativos.
Salir de la aplicación cuando todas las ventanas estén cerradas (Windows & Linux)
En Windows y Linux, al salir de todas las ventanas generalmente se cierra una aplicación por completo.
To implement this, listen for the app module's 'window-all-closed' event, and call app.quit() if the user is not on macOS (darwin).
app.on('window-all-closed', () => {
  if (process.platform !== 'darwin') app.quit()
})
Abra una ventana si no hay ninguna abierta (macOS)
Mientras que las aplicaciones de Linux y Windows se cierran cuando no tienen ventanas abiertas, las aplicaciones de macOS generalmente siguen ejecutándose incluso sin ninguna ventana abierta, y activar la aplicación cuando no hay ventanas disponibles debería abrir una nueva.
To implement this feature, listen for the app module's activate event, and call your existing createWindow() method if no browser windows are open.
Debido a que las ventanas no se pueden crear antes del evento ready, solo debería escuchar el evento activate después de inicializar tu aplicación. Haga esto adjuntando su listener de eventos desde su llamada whenReady() existente.
app.whenReady().then(() => {
  createWindow()

  app.on('activate', () => {
    if (BrowserWindow.getAllWindows().length === 0) createWindow()
  })
})
Nota: ¡En este punto, los controles de tu ventana deberían ser completamente funcionales!
Acceda a Node.js desde el renderizador con un script precargado
Ahora, lo último que debe hacer es imprimir los números de versión de Electron y sus dependencias en su página web.
Acceder a esta información es trivial de hacer en el proceso principal a través del objeto global process de Node. Sin embargo, no se puede editar el DOM desde el proceso principal porque no tiene acceso al contexto document del renderizador. ¡Están en procesos totalmente diferentes!
Note: If you need a more in-depth look at Electron processes, see the Process Model document.
Aquí es donde es práctico adjuntar un script preload a su renderizador. Un preload script se ejecuta antes de que el proceso de renderizado sea cargado, y tiene acceso a ambos renderer globals (e.g. window y document) y un entorno Node.js.
Crear un nuevo script llamado preload.js como tal:
window.addEventListener('DOMContentLoaded', () => {
  const replaceText = (selector, text) => {
    const element = document.getElementById(selector)
    if (element) element.innerText = text
  }

  for (const dependency of ['chrome', 'node', 'electron']) {
    replaceText(`${dependency}-version`, process.versions[dependency])
  }
})
El código anterior accede al objeto Node.js process.versions y ejecuta una función auxiliar básica replaceText para insertar los números de versión en el documento HTML.
Para adjuntar este script a tu proceso de renderizado, proporciona la ruta a tu script de precarga a la opción webPreferences.preload en su constructor existente BrowserWindow.
const { app, BrowserWindow } = require('electron')
// include the Node.js 'path' module at the top of your file
const path = require('node:path')

// modify your existing createWindow() function
const createWindow = () => {
  const win = new BrowserWindow({
    width: 800,
    height: 600,
    webPreferences: {
      preload: path.join(__dirname, 'preload.js')
    }
  })

  win.loadFile('index.html')
}
// ...
There are two Node.js concepts that are used here:
- La cadena
__dirnameapunta a la ruta del script actualmente en ejecución (en este caso, la carpeta raíz de tu proyecto). - La API
path.joinune varios segmentos de rutas juntos, creando una cadena de ruta combinada que funciona en todas las plataformas.
We use a path relative to the currently executing JavaScript file so that your relative path will work in both development and packaged mode.
Bonus: Add functionality to your web contents
At this point, you might be wondering how to add more functionality to your application.
For any interactions with your web contents, you want to add scripts to your renderer process. Because the renderer runs in a normal web environment, you can add a <script> tag right before your index.html file's closing </body> tag to include any arbitrary scripts you want:
<script src="./renderer.js"></script>
The code contained in renderer.js can then use the same JavaScript APIs and tooling you use for typical front-end development, such as using webpack to bundle and minify your code or React to manage your user interfaces.
Recap
After following the above steps, you should have a fully functional Electron application that looks like this:
The full code is available below:
// main.js

// Modules to control application life and create native browser window
const { app, BrowserWindow } = require('electron')
const path = require('node:path')

const createWindow = () => {
  // Create the browser window.
  const mainWindow = new BrowserWindow({
    width: 800,
    height: 600,
    webPreferences: {
      preload: path.join(__dirname, 'preload.js')
    }
  })

  // and load the index.html of the app.
  mainWindow.loadFile('index.html')

  // Open the DevTools.
  // mainWindow.webContents.openDevTools()
}

// This method will be called when Electron has finished
// initialization and is ready to create browser windows.
// Algunas APIs pueden solamente ser usadas despues de que este evento ocurra.
app.whenReady().then(() => {
  createWindow()

  app.on('activate', () => {
    // On macOS it's common to re-create a window in the app when the
    // dock icon is clicked and there are no other windows open.
    if (BrowserWindow.getAllWindows().length === 0) createWindow()
  })
})

// Quit when all windows are closed, except on macOS. There, it's common
// for applications and their menu bar to stay active until the user quits
// explicitly with Cmd + Q.
app.on('window-all-closed', () => {
  if (process.platform !== 'darwin') app.quit()
})

// In this file you can include the rest of your app's specific main process
// code. Tu también puedes ponerlos en archivos separados y requerirlos aquí.
// preload.js

// All the Node.js APIs are available in the preload process.
// It has the same sandbox as a Chrome extension.
window.addEventListener('DOMContentLoaded', () => {
  const replaceText = (selector, text) => {
    const element = document.getElementById(selector)
    if (element) element.innerText = text
  }

  for (const dependency of ['chrome', 'node', 'electron']) {
    replaceText(`${dependency}-version`, process.versions[dependency])
  }
})
<!--index.html-->
<!DOCTYPE html>
<html lang="en">
  <head>
    <meta charset="UTF-8">
    <!-- https://developer.mozilla.org/en-US/docs/Web/HTTP/CSP -->
    <meta http-equiv="Content-Security-Policy" content="default-src 'self'; script-src 'self'">
    <title>Hello World!</title>
  </head>
  <body>
    <h1>Hello World!</h1>
    We are using Node.js <span id="node-version"></span>,
    Chromium <span id="chrome-version"></span>,
    and Electron <span id="electron-version"></span>.

    <!-- You can also require other files to run in this process -->
    <script src="./renderer.js"></script>
  </body>
</html>
- main.js
- preload.js
- index.html
const { app, BrowserWindow } = require('electron/main')
const path = require('node:path')

function createWindow () {
  const win = new BrowserWindow({
    width: 800,
    height: 600,
    webPreferences: {
      preload: path.join(__dirname, 'preload.js')
    }
  })

  win.loadFile('index.html')
}

app.whenReady().then(() => {
  createWindow()

  app.on('activate', () => {
    if (BrowserWindow.getAllWindows().length === 0) {
      createWindow()
    }
  })
})

app.on('window-all-closed', () => {
  if (process.platform !== 'darwin') {
    app.quit()
  }
})
window.addEventListener('DOMContentLoaded', () => {
  const replaceText = (selector, text) => {
    const element = document.getElementById(selector)
    if (element) element.innerText = text
  }

  for (const type of ['chrome', 'node', 'electron']) {
    replaceText(`${type}-version`, process.versions[type])
  }
})
<!DOCTYPE html>
<html>
<head>
    <meta charset="UTF-8">
    <title>Hello World!</title>
    <meta http-equiv="Content-Security-Policy" content="script-src 'self' 'unsafe-inline';" />
</head>
<body>
    <h1>Hello World!</h1>
    <p>
        We are using Node.js <span id="node-version"></span>,
        Chromium <span id="chrome-version"></span>,
        and Electron <span id="electron-version"></span>.
    </p>
</body>
</html>
To summarize all the steps we've done:
-
We bootstrapped a Node.js application and added Electron as a dependency.
-
We created a
main.jsscript that runs our main process, which controls our app and runs in a Node.js environment. In this script, we used Electron'sappandBrowserWindowmodules to create a browser window that displays web content in a separate process (the renderer). -
In order to access certain Node.js functionality in the renderer, we attached a preload script to our
BrowserWindowconstructor.
Package and distribute your application
The fastest way to distribute your newly created app is using Electron Forge.
To build an RPM package for Linux, you will need to install its required system dependencies.
-
Add a description to your
package.jsonfile, otherwise rpmbuild will fail. Blank description are not valid. -
Add Electron Forge as a development dependency of your app, and use its
importcommand to set up Forge's scaffolding:- npm
- Yarn
npm install --save-dev @electron-forge/cli
npx electron-forge import

✔ Checking your system
✔ Initializing Git Repository
✔ Writing modified package.json file
✔ Installing dependencies
✔ Writing modified package.json file
✔ Fixing .gitignore

We have ATTEMPTED to convert your app to be in a format that electron-forge understands.

Thanks for using "electron-forge"!!!
npm install --save-dev @electron-forge/cli
yarn dlx electron-forge import
✔ Checking your system
✔ Initializing Git Repository
✔ Writing modified package.json file
✔ Installing dependencies
✔ Writing modified package.json file
✔ Fixing .gitignore
We have ATTEMPTED to convert your app to be in a format that electron-forge understands.
Thanks for using "electron-forge"!!! -
Create a distributable using Forge's
makecommand:- npm
- Yarn
npm run make

> my-electron-app@1.0.0 make /my-electron-app
> electron-forge make

✔ Checking your system
✔ Resolving Forge Config
We need to package your application before we can make it
✔ Preparing to Package Application for arch: x64
✔ Preparing native dependencies
✔ Packaging Application
Making for the following targets: zip
✔ Making for target: zip - On platform: darwin - For arch: x64
yarn make
> my-electron-app@1.0.0 make /my-electron-app
> electron-forge make
✔ Checking your system
✔ Resolving Forge Config
We need to package your application before we can make it
✔ Preparing to Package Application for arch: x64
✔ Preparing native dependencies
✔ Packaging Application
Making for the following targets: zip
✔ Making for target: zip - On platform: darwin - For arch: x64Electron Forge creates the
outfolder where your package will be located:// Example for macOS
out/
├── out/make/zip/darwin/x64/my-electron-app-darwin-x64-1.0.0.zip
├── ...
└── out/my-electron-app-darwin-x64/my-electron-app.app/Contents/MacOS/my-electron-app