Using Preload Scripts
This is part 3 of the Electron tutorial.
Learning goals
In this part of the tutorial, you will learn what a preload script is and how to use one to securely expose privileged APIs into the renderer process. You will also learn how to communicate between main and renderer processes with Electron's inter-process communication (IPC) modules.
What is a preload script?
Electron's main process is a Node.js environment that has full operating system access. On top of Electron modules, you can also access Node.js built-ins, as well as any packages installed via npm. On the other hand, renderer processes run web pages and do not run Node.js by default for security reasons.
To bridge Electron's different process types together, we will need to use a special script called a preload.
Augmenting the renderer with a preload script
A BrowserWindow's preload script runs in a context that has access to both the HTML DOM and a limited subset of Node.js and Electron APIs.
From Electron 20 onwards, preload scripts are sandboxed by default and no longer have access to a full Node.js environment. Practically, this means that you have a polyfilled require function that only has access to a limited set of APIs.
| Available API | Details |
|---|---|
| Electron modules | Renderer process modules |
| Node.js modules | events, timers, url |
| Polyfilled globals | Buffer, process, clearImmediate, setImmediate |
For more information, check out the Process Sandboxing guide.
Preload scripts are injected before a web page loads in the renderer, similar to a Chrome extension's content scripts. To add features to your renderer that require privileged access, you can define global objects through the contextBridge API.
To demonstrate this concept, you will create a preload script that exposes your app's versions of Chrome, Node, and Electron into the renderer.
Add a new preload.js script that exposes selected properties of Electron's process.versions object to the renderer process in a versions global variable.
const { contextBridge } = require('electron')

contextBridge.exposeInMainWorld('versions', {
  node: () => process.versions.node,
  chrome: () => process.versions.chrome,
  electron: () => process.versions.electron
  // we can also expose variables, not just functions
})
To attach this script to your renderer process, pass its path to the webPreferences.preload option in the BrowserWindow constructor:
const { app, BrowserWindow } = require('electron')

const path = require('node:path')

const createWindow = () => {
  const win = new BrowserWindow({
    width: 800,
    height: 600,
    webPreferences: {
      preload: path.join(__dirname, 'preload.js')
    }
  })

  win.loadFile('index.html')
}

app.whenReady().then(() => {
  createWindow()
})
At this point, the renderer has access to the versions global, so let's display that information in the window. This variable can be accessed via window.versions or simply versions. Create a renderer.js script that uses the document.getElementById DOM API to replace the displayed text for the HTML element with info as its id property.
const information = document.getElementById('info')
information.innerText = `This app is using Chrome (v${versions.chrome()}), Node.js (v${versions.node()}), and Electron (v${versions.electron()})`
Then, modify your index.html by adding a new element with info as its id property, and attach your renderer.js script:
<!DOCTYPE html>
<html>
  <head>
    <meta charset="UTF-8" />
    <meta
      http-equiv="Content-Security-Policy"
      content="default-src 'self'; script-src 'self'"
    />
    <meta
      http-equiv="X-Content-Security-Policy"
      content="default-src 'self'; script-src 'self'"
    />
    <title>Hello from Electron renderer!</title>
  </head>
  <body>
    <h1>Hello from Electron renderer!</h1>
    <p>👋</p>
    <p id="info"></p>
  </body>
  <script src="./renderer.js"></script>
</html>
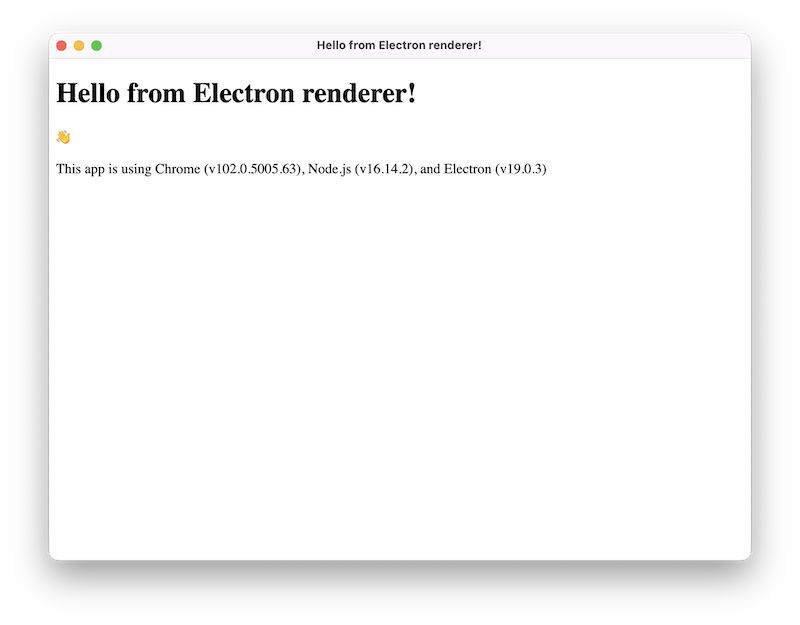
After following the above steps, your app should look something like this:
And the code should look like this:
- main.js
- preload.js
- index.html
- renderer.js
const { app, BrowserWindow } = require('electron/main')
const path = require('node:path')

const createWindow = () => {
  const win = new BrowserWindow({
    width: 800,
    height: 600,
    webPreferences: {
      preload: path.join(__dirname, 'preload.js')
    }
  })

  win.loadFile('index.html')
}

app.whenReady().then(() => {
  createWindow()

  app.on('activate', () => {
    if (BrowserWindow.getAllWindows().length === 0) {
      createWindow()
    }
  })
})

app.on('window-all-closed', () => {
  if (process.platform !== 'darwin') {
    app.quit()
  }
})
const { contextBridge } = require('electron/renderer')

contextBridge.exposeInMainWorld('versions', {
  node: () => process.versions.node,
  chrome: () => process.versions.chrome,
  electron: () => process.versions.electron
})
<!DOCTYPE html>
<html>
  <head>
    <meta charset="UTF-8" />
    <meta
      http-equiv="Content-Security-Policy"
      content="default-src 'self'; script-src 'self'"
    />
    <meta
      http-equiv="X-Content-Security-Policy"
      content="default-src 'self'; script-src 'self'"
    />
    <title>Hello from Electron renderer!</title>
  </head>
  <body>
    <h1>Hello from Electron renderer!</h1>
    <p>👋</p>
    <p id="info"></p>
  </body>
  <script src="./renderer.js"></script>
</html>
const information = document.getElementById('info')
information.innerText = `This app is using Chrome (v${window.versions.chrome()}), Node.js (v${window.versions.node()}), and Electron (v${window.versions.electron()})`
Communicating between processes
As we have mentioned above, Electron's main and renderer process have distinct responsibilities and are not interchangeable. This means it is not possible to access the Node.js APIs directly from the renderer process, nor the HTML Document Object Model (DOM) from the main process.
The solution for this problem is to use Electron's ipcMain and ipcRenderer modules for inter-process communication (IPC). To send a message from your web page to the main process, you can set up a main process handler with ipcMain.handle and then expose a function that calls ipcRenderer.invoke to trigger the handler in your preload script.
To illustrate, we will add a global function to the renderer called ping() that will return a string from the main process.
First, set up the invoke call in your preload script:
const { contextBridge, ipcRenderer } = require('electron')

contextBridge.exposeInMainWorld('versions', {
  node: () => process.versions.node,
  chrome: () => process.versions.chrome,
  electron: () => process.versions.electron,
  ping: () => ipcRenderer.invoke('ping')
  // we can also expose variables, not just functions
})
Notice how we wrap the ipcRenderer.invoke('ping') call in a helper function rather than expose the ipcRenderer module directly via context bridge. You never want to directly expose the entire ipcRenderer module via preload. This would give your renderer the ability to send arbitrary IPC messages to the main process, which becomes a powerful attack vector for malicious code.
Then, set up your handle listener in the main process. We do this before loading the HTML file so that the handler is guaranteed to be ready before you send out the invoke call from the renderer.
const { app, BrowserWindow, ipcMain } = require('electron/main')

const path = require('node:path')

const createWindow = () => {
  const win = new BrowserWindow({
    width: 800,
    height: 600,
    webPreferences: {
      preload: path.join(__dirname, 'preload.js')
    }
  })
  win.loadFile('index.html')
}
app.whenReady().then(() => {
  ipcMain.handle('ping', () => 'pong')
  createWindow()
})
Once you have the sender and receiver set up, you can now send messages from the renderer to the main process through the 'ping' channel you just defined.
const func = async () => {
  const response = await window.versions.ping()
  console.log(response) // prints out 'pong'
}

func()
For more in-depth explanations on using the ipcRenderer and ipcMain modules, check out the full Inter-Process Communication guide.
Zusammenfassung
A preload script contains code that runs before your web page is loaded into the browser window. It has access to both DOM APIs and Node.js environment, and is often used to expose privileged APIs to the renderer via the contextBridge API.
Because the main and renderer processes have very different responsibilities, Electron apps often use the preload script to set up inter-process communication (IPC) interfaces to pass arbitrary messages between the two kinds of processes.
In the next part of the tutorial, we will be showing you resources on adding more functionality to your app, then teaching you how to distribute your app to users.